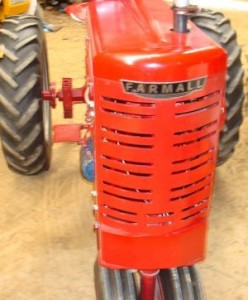
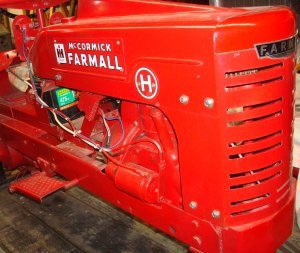
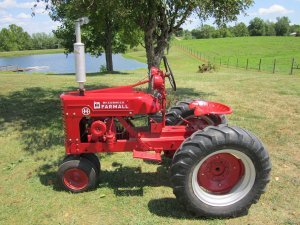
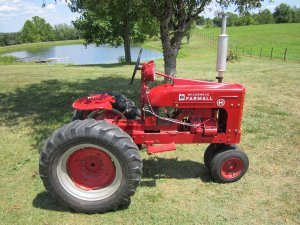
Note: There’s a video of the Mini-H pulling a plow under the Special Projects in the Video Section of this website.
The Mini-H took about 4 months (part time work) to build although it seems to be a continuous process to change and modify different parts and characteristics. I don’t know that it will ever be exactly the way that I want it. The beginning of the project involved looking at as many H’s as I could find and taking pictures from various angles. These were used to determine the overall look of the final product as well as approximating the lengths of various sections of the tractor. The mini-H wasn’t built to any scale, but wherever possible, I tried to get the correct proportions. Also, I’m not real good about taking pictures as I build. I get anxious to finish something and don’t take the time to stop and take pictures. Therefore, you’ll notice that a lot of pictures in this description were taken “after the fact.” Sometimes it’s a little harder to illustrate or show after something has been completed and painted, but I hope you can get the idea as you read through the description.
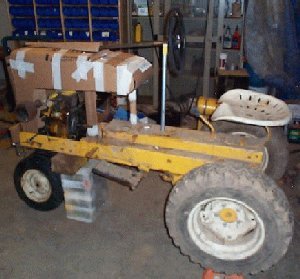
Both the Mini-560 and the Mini-H began life as Cub Cadet Model 100’s. When I made the mini-560, I’d simply used the front grille housing and rear pedestal support to hold the added sheet metal in place. The H has a much longer, narrower appearance then the 560. It seemed that using the housing and pedestal to make the H would produce a tractor that would appear too wide. I wanted to avoid having to produce a new frame so I just removed the front housing and the pedestal support and kept the main frame intact. I began the project by making a card board mockup of what the finished project would look like.
I had done a lot of experimenting with tires and wheels on the Mini-560 to get the “proportional look” that I wanted. Since I didn’t want to go through that process again, I used the same size tires and wheels on the Mini-H. The front tires are 3.50 X 8 and the rear tires are 7.50 X 18. I purchased the front tires new and mounted them on the Cub Cadet rims. I purchased the rear tires and wheels from a tractor salvage. The guy there told me they came off a corn planter, but a different salvage yard where I purchased the ones for the Mini-560 told me they came off a manure spreader. They could both be correct; I don’t know.
It’s hard to tell in the picture above, but the rear wheels are supported off the ground, and the two front tires are leaning against one another for support. The steering wheel shaft is just laying on the cardboard. From the mockup it seemed that the tractor was going to need every bit of length I could get using the original frame. The seat seemed to be in the correct position with respect to the rear wheels and the rear end of the tractor. The location of the seat dictated the location of the steering wheel and all the sheet metal had to sat forward of the post supporting the steering wheel.
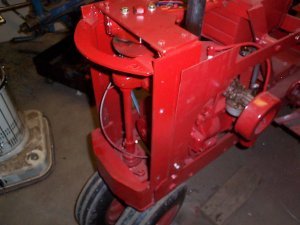
I began by mounting the vertical support for the front axle. (Notice the above picture was taken much, much, much later in the process.) I knew from my experience with the mini-560 that this would be a 1 1/4″ diameter shaft. Calculations had shown that the shaft didn’t have to be that large, but a smaller shaft just didn’t look right. The rear wheels probably should’ve been completed first, but, again, I already had the mini-560 completed and could get any height measurements I needed from it. And, since I’d had that experience, I knew that would be fairly easy to do. I cut off a piece of 3/8″ thick by 6″ wide flat that would fit across under the front frame of the tractor. I machined a 1 ½”+ diameter hole in the center of this piece to allow for clearance around the 1 1/4″ vertical shaft that the front wheels would connect to. I moved the 3/8″ plate as far forward as I could get it and still have the centerline of the vertical shaft behind the front end of the frame and bolted in in position.
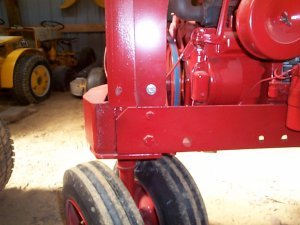
Notice in the picture below how the centerline of the front wheels is right under the end of the original frame. Adding this extra length also allowed me to build a front end housing below the grill that better simulated an H front end.
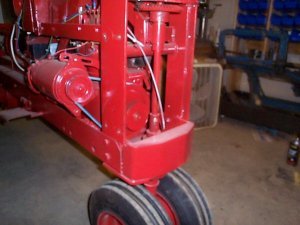
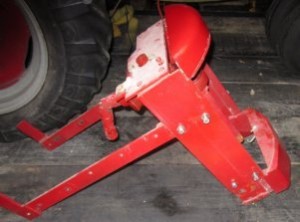
The front end extension is made of 1/4″ X 4″ flat iron sections welded together to approximate the shape of the front end of an H. Each side piece butts up against the original cub cadet frame with pieces welded to the inside that extend back into the frame of the tractor where they are bolted to the sides. These extensions provide some support, but the front wheels are supported mainly by the original tractor frame.
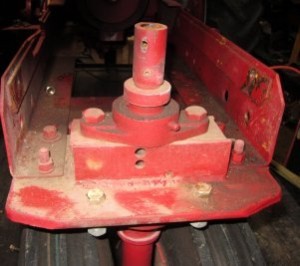
I mounted a 4-bolt, 1 1/4″ flange bearing to the bottom of the plate centered on the 1 ½” diameter hole. I welded together a metal “box” on top of the plate to support a 1″ diameter 2-bolt flange bearing centered over the 1 ½” diameter hole. I turned down the top of the 1 1/4″ diameter shaft to a 1″ diameter for about 2 inches and turned down the top one inch of the shaft to a 3/4″ diameter. The shaft extends up through the bottom bearing and through the top bearing with the 3/4″ diameter section on the very top. A locking collar around the 1″ diameter portion of the shaft prevents it from dropping back out. A longer collar added to the 3/4″ diameter section of the shaft connects to a shaft that reaches to the top of the tractor. Eventually, after I had everything assembled and at the correct height, I slid a 1/4″ thick washer (1 1/4″ bore) up against the bottom bearing and welded it in place. That prevents the shafting from sliding up through the bottom bearing.
I drilled a 3/4″ diameter hole horizontally through the 1 1/4″ diameter shaft about an inch from the bottom. I pushed a 3/4″ diameter shaft through the hole and welded it in place. I bent each side of the shaft down at a slight angle to toe the front wheels in at the bottom. I slid a 1/4″ thick washer (3/4″ bore) over each shaft and welded them in place about 3/4″ out from the center shaft (for the inside wheel bearing to rest against). I placed the front wheels on the shaft, determined the proper length, cut off the 3/4″ shafts, drilled and tapped the ends for a 3/8″ bolt, replaced the wheels and bolted them on. The front end was done!!!!! Well, except for the steering….
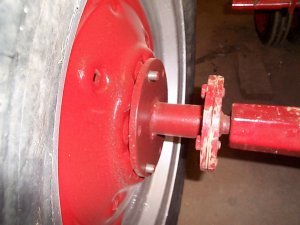
After completing the front end, I was anxious to get the tractor on wheels so I could move it around – even without the steering attached. The only difficult part for the rear end was making the wheel adapter and extension. The inside hub (that bolts to the original Cub Cadet axle) is 5.375 inches with 5 equally spaced holes located on a 4.5 inch diameter. The outside hub is 7.0 inches in diameter with 6 holes located on a 6 inch diameter. Both hubs were milled from 3/8 inch plate. The inner hole for each hub has a 1.9 inch diameter bore that fits over a piece of thick wall tubing that I had. The hubs were all cut on a CNC milling machine.
I pressed the hubs over a 6 inch long piece of the thick wall tubing. I took three 3/8″ coupler nuts and screwed bolts in until there length was the correct inside dimension for the spacing between the two hubs. I used a nut to lock them at the correct length. The three coupler nuts and attached bolts were spaced equally around the hubs and a C-clamp was used to pull the hubs in tight against them. (Unfortunately, just like for the Mini-560, I didn’t take any pictures of the assembly before welding.) That assured that the two hubs were parallel. The center tube was then welded to each hub. After the hubs were welded, I tapped the holes. The inner hub just had to have clearance for a 3/8″ bolt; the bolts just go through the hub and screw into the original cub cadet hub. The outer hub had to be tapped for a ½-20 NF thread. The hubs and wheels were installed on the tractor. The tractor was now completely on it’s own wheels!!!
Since I’d removed the pedestal there was no support for the upper pivot point for the clutch release lever. I bolted an angle arm to the frame and added the pivot for attachment of the clutch release lever. It was one of the easiest changes I had to make.
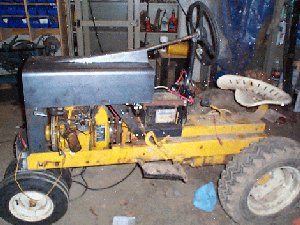
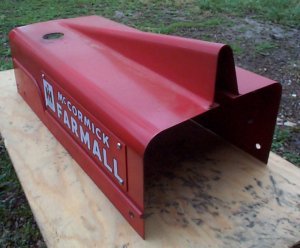
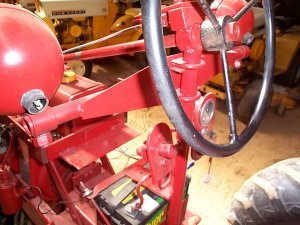
Next, I had planned to work on just the steering. But it soon became evident that the framework to hold the steering would be the same framework that held the sheetmetal. So I decided to make the sheetmetal and build the framework along with the steering. I bent the center section of the hood out of a piece of 16 gage metal using a homemade roll bender. (The roll bender was made for me by two students as a project when I was building the mini-560. There’s a writeup on it in the “Tips and Tools” section.) Again, the above picture was taken much later in the process and already contains the section that the steering shaft extends through. This section was added after the steering shaft was in place.
The roll bender was designed to produce a 2 inch diameter bend. I experimented with several pieces of scrap to determine the correct location of the bends to just fit the width of the original frame. After the central hood section was bent, I could determine where it had to to supported.
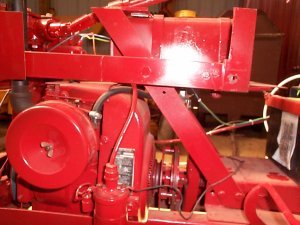
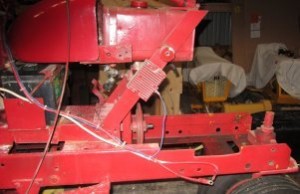
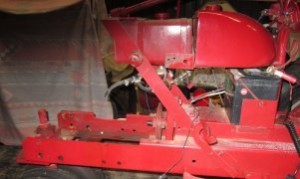
It was a simple matter to build up a framework in the front to support the front section of the hood. But the rear section also had to support the front of the steering shaft as well as the back of the hood. I didn’t want to connect supports extending up from the engine, so the supports to hold the front of the steering shaft had to angle forward and upward from a connection on the frame behind the engine. (The problem was that the steering shaft had to extend quite a way forward to look right.) I bolted two 1/4 by 2″ pieces of flat iron to the inside portion of the frame just outside the angle holding the upper pivot point for the clutch release lever and angled them forward to a point that would support the front of the steering shaft. I ran a piece of 1/4 by 2″ piece of flat horizontally from the front hood support rearward to the location in the back where the rear of the hood would attach. I had to place a spacer between these horizontal pieces and the angled pieces I had previously installed. (You can see this spacer in the picture below.) The hood now had a good support system as well as providing a support for the end of the shaft that held the steering wheel.
I used a section of 3/4″ pipe and the home made roll bender to bend the center section of the hood – the section the steering shaft extends through. I cut a slot in the main hood section and welded this piece over the slot. I used Bondo to make a smooth transition. You can see the sections containing the Bondo and the wood section I made for the front of the hood in the picture above.
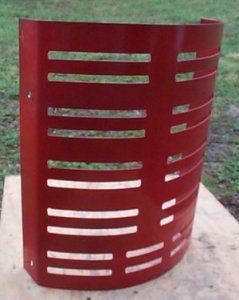
The front grill was made on a CNC mill. It was milled out of a piece of flat 16 gage sheet metal and then rolled and bent into the final configuration. I made the entire grill one piece rather then leaving the cut out that an H has that allows for “steering” cultivators.
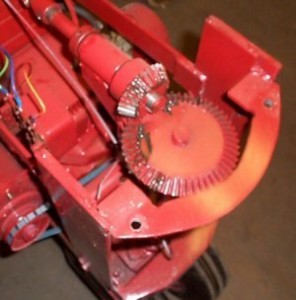
With all the supports in place for the grill and hood, I could work on installing the steering. My first attempt involved using two bevel gears. Although the bevel gears worked (and it was a very simple setup), and I used them as the steering setup for about a year, the steering was too quick, and the tractor was no fun to drive. You were continually making steering corrections and couldn’t just relax and drive the tractor.
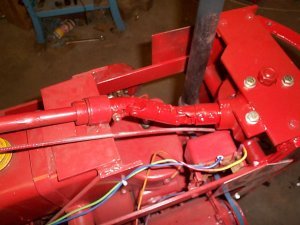
I have since replaced the bevel gears with a steering gear from a Cub Cadet. Since I had limited space available, it wasn’t an easy fit, but I managed to fit everything in. I mounted the Cub Cadet steering gearbox offset to the right of the front steering shaft. It required two u-joints to get from the steering shaft in the center of the tractor to the gear box. (It also required cutting off some of the steering gear housing to shorten it and allow enough space.)
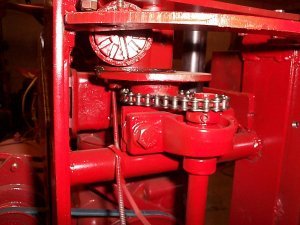
I took the “steering lever and bolt assembly” out of the gear box, chucked the bolt that’s welded to it into a lathe and turned down the section of the bolt and weld that protrudes out of the steering arm to a 1/2″ diameter. The 1/2″ diameter was used to “accurately” center an 18 tooth sprocket over the turned down section. I welded that sprocket in place and mounted a 12 tooth sprocket on top of the vertical steering shaft that runs up from the front wheels. Since the steering gearbox from the Cub Cadet didn’t give me as sharp a turning radius as I wanted, a chain drive from the Cub Cadet steering gearbox to the top of the Mini-H steering shaft gave me a larger ratio. That also allowed for a little more room to work with the offset steering gearbox . With the current setup, I get about a 160 degree steering angle — didn’t measure it so I’m not sure of the exact angle.
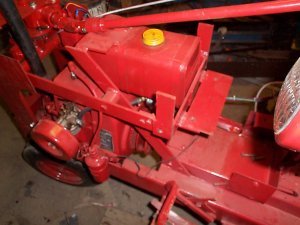
It’s hard to believe, but one of the most difficult and time consuming things I encountered was trying to find room for a gas tank. I tried several different locations and several different gas tanks. I think at one time or another I’ve had at least 4 different gas tanks on the tractor in at least 4 different locations and orientations. I finally found a gas tank from an 8 hp Briggs and Stratton engine that fit almost perfectly in the space I had available. I say almost perfectly because I had to do a little bending (hammering) on the front bottom lip of the gas tank to get it into position. It does fit very nicely and looks like it was designed to go in the current location.
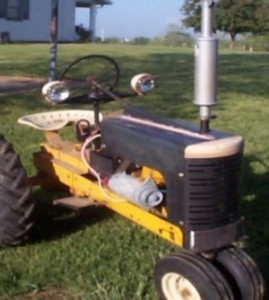
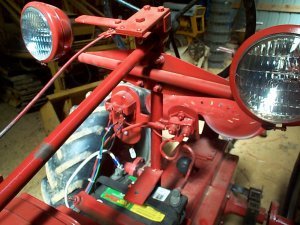
The finishing touches for the Mini-H included making a panel to hold the ammeter, a support to hold the starter button and the headlight panel. I didn’t place “backs” on any of the instrument panels because of the limited space that was available. To make these panels, I simply modeled the parts in Pro/E and machined them on a CNC mill. They’re machined from 1/4″ steel. It’s not obvious in the picture, but the panel holding the starter button is welded on angling slightly backwards as the original would have been mounted on an H.
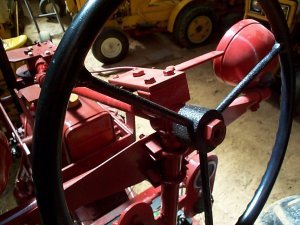
The throttle support is one of those things that still needs to be made. Currently, there is just a piece of rectangular metal bolted to the top of the rear steering wheel support with a friction disk to supply a holding torque to keep it in the correct position. While I don’t plan to make a “toothed” section like the H has, I do want to cut out a circular disk to replace the rectangular section to give it a more authentic look.
The headlights are from an International combine. It was a simple matter to cut out a piece of sheet metal, weld it to a 1/2″ diameter pipe and use muffler brackets to connect it to the rear steering wheel support.
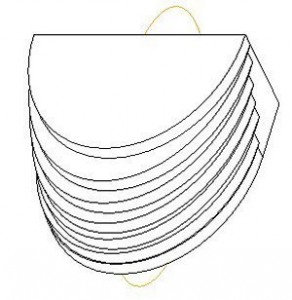
The very front of the hood and what would be the gas tank on a “real” H are made of wood, bondo and plaster. For the front section I made a rough model out of wood, made a steel template with a 2″ diameter cutout and used it to shape plaster to give it the right curvature. For the gas tank, I modeled and assembled several elliptical sections in Pro/E to get the look that I wanted. (The sections are elliptical when viewed from above and from the side.) I then traced those sections on 1″ boards and cut them out on a band saw. I glued all the sections together, sanded them to approximate the shape I wanted, applied plaster and some Bondo, and smoothed and sanded it to get the final shape. I’ve used those sections that way for over a year, but I’m afraid to leave the tractor outside during a rain. I’m currently in the process of using those sections for patterns to make a mold. I plan on using the mold to make fiberglass sections to replace the wood, Bondo and plaster.
I still have a few things to do besides replacing the front hood and gas tank before I will consider the Mini-H complete – although I think I will forever be making changes. The main addition is to add a “swinging drawbar” in place of the fixed drawbar that’s currently on it. I also need to add the “H” emblem to each side of the hood. I’ll add those details ‘if and when’ I get the time and ambition.
I hope you enjoyed reading about my experiences building the Mini-H. The Mini-560 had been so easy to build, that I was not expecting the Mini-H to be any problem at all. The Mini-H turned out to be a lot more complicated and took a lot longer then I had originally intended. But it was truly an enjoyable experience.
I finally got around to finishing four more projects on the Mini-H: 1) replace the wooden gas tank and hood section, 2) replace the throttle control, 3) replace the drawbar, and 4) install a smaller starter.
Replacing the wooden gas tank and hood section
As I had indicated in the previous discussion, I had made the gas tank section and front hood section of the Mini-H out of wood, Bondo and plaster. I used these sections to make a fiberglass mold.
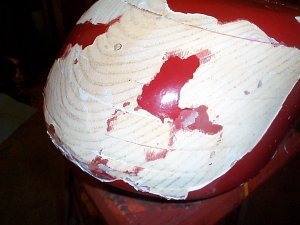
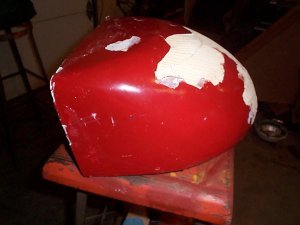
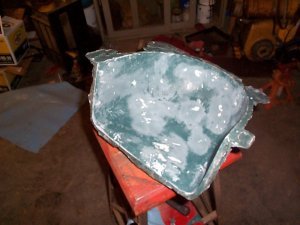
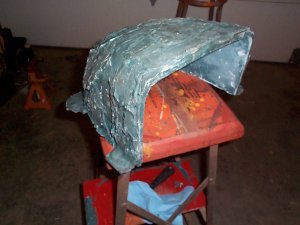
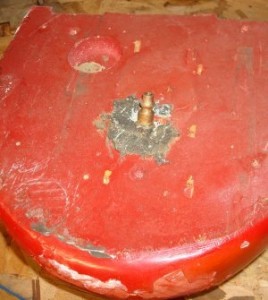
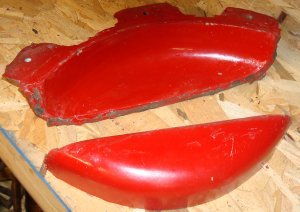
You can see in the pictures, the original wooden tank I used for a pattern. In the picture, you can see the wood used to make the original tank structure. You can also see the paint and plaster that peeled off when I removed the fiberglass mold.
At the time I was working on this part of the project, I had a student that worked on Unlimited Hydroplanes and was very knowledgeable in fiberglass work. His advice was to wax the pattern several times, coat it with hairspray and use Kitty Hair fiberglass to cover the pattern. He warned me that the fiberglass would shrink as it hardened and would be somewhat of a problem to remove from the pattern – and he was right. His recommendation was to wax the pattern 3 times, but I waxed it 7 times. He recommended I spray it with hairspray once, but I sprayed it 3 times. I used a short strand Kitty Hair fiberglass to cover the pattern with a thin layer and backed it up with a long strand fiberglass. I fastened a piece of plywood across the bottom and back of the pattern to give me some flat surfaces to work with.
The only problem I encountered was removing the mold (the outer shell) from the pattern (the original wooden gas tank). As the fiberglass shrank, it really gripped the wooden mold. I couldn’t get it loose. I finally ended up drilling a hole up through the bottom of the wooden gas tank all the way through the fiberglass mold. I used fiberglass to repair (fill) the hole in the mold and screwed an air hose fitting into the bottom of the wooden gas tank.
Now, when I applied pressure to the fitting, it forced air up through the hole and between the mold and pattern (air couldn’t escape out through the top since I’d placed fiberglass over the hole). I applied air pressure, smacked the mold with a rubber mallet and the mold released from the pattern!!!
I used the same procedure to make the new fiberglass tank that I used to make the mold. I painted the pattern (twice), waxed it (7 times) and coated it with hairspray (twice). I again used a short strand Kitty Hair fiberglass next to the pattern and a long strand as reinforcement.
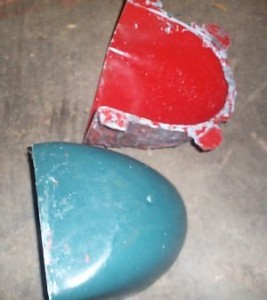
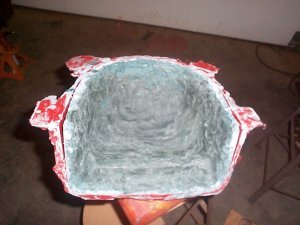 Notice in the picture, this time the fiberglass part pulled away from the fiberglass mold as it shrank. You can see in the picture the space between the two. This time the tank part was fairly easy to remove from the mold because of the shrinkage. The finished part and original mold looked like this:
The red section is the original mold and the blue is the finished part. Although it looks good in the picture, it did have a lot of small air pockets. I used a glaze coating to repair all of these pits.
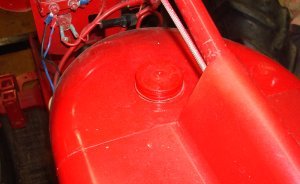
Realize the finished part is hollow. I placed a board across the bottom and fiberglassed it in place for mounting in the tractor. (I didn’t take a picture of that). I took a piece of 1 ½” diameter copper pipe and attached the top threaded section of a cub cadet gas tank to it. I capped the bottom of the copper pipe section and placed a ¼” barbed fitting in it. I drilled a hole in the fiberglass tank, slid the copper section down through the hole and fiberglassed it in place. I ran a ¼” gas line from the barbed fitting to the gas tank located under the hood of the Mini-H. The copper pipe acts as a standpipe that I use to fill the actual gas tank.
I used the same procedure to replace the front section of the hood that I’d also made of wood, Bondo, and plaster. I actually made it before the gas tank as “practice”, but discussed the tank procedure first here since it was a lot more complicated.
Replacing the throttle control
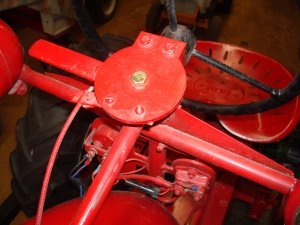
The throttle control still isn’t exactly what I want, but it’s a lot closer. I wanted a round, tapered section like on an H, but couldn’t figure out how to scale it to make it look correct. I settled for cutting a circular section out on a CNC mill and using it to replace my original design.
Replacing the drawbar
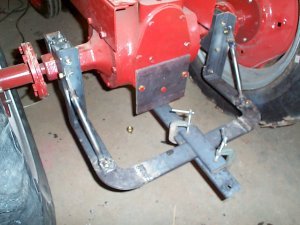
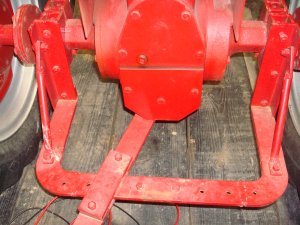
When I originally built the Mini-H, I just kept the rear hitch that was on the Cub Cadet I used to make the Mini-H. An H has a very distinctive rear drawbar. I was stuck on how to make the two bends on the sides of the drawbar. A bend that sharp would “warp” any metal that I would try to bend.
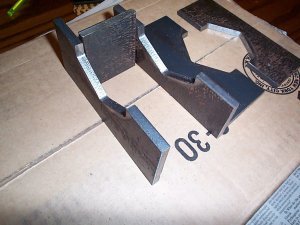
In one of those insightful moments that we have, I realized that I could cut the corner sections out on a mill and weld in the straight sections. With this plan in place, I cut out the two corner sections as well as the sections to mount to the Cub Cadet axle.
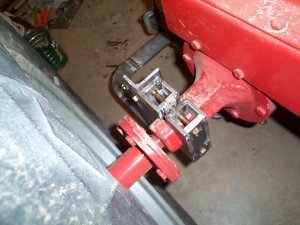
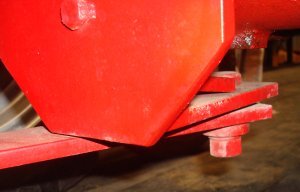
I needed a larger radius for the swinging drawbar, so I bolted a section to the transmission where the original Cub Cadet hitch was connected. I welded a piece of 3/8” by 2 1/2” steel to the bottom of this section extending forward 6”. I drilled a 5/8”” diameter hole 1” from the front of this section and connected the swinging drawbar to it. I welded a brace from the back of the section that’s bolted to the transmission and the 6″ piece. In the picture you can barely make out the end of the angled brace on top of the 6″ section.
The final product resembles the swinging drawbar on an H.
Replacing the starter
The front end of an H is a long narrow section. On the Mini-H that I built, the starter/generator stuck out far enough that it ruined the effect of a long narrow shape. I decided to replace the starter/generator with a gear drive starter and internal charging system. I purchased a starter and replaced the flywheel with one that had a starter ring on it. I also purchased a solid state regulator that was made for a 7 or 8 hp Kohler engine. I had to cut out a small section of the Mini-H frame right below the starter, but the rest of the replacement was pretty routine. Here’s a picture from the side before the starter was painted.
And, here’s a picture from the front.
And, here’s the finished product.
If you’re familiar with the starter/generator on older model Cub Cadets, you can see what a difference in width the smaller starter makes.
And, here’s the “finished” Mini H.
I’d like to think I’m finished with the Mini-H and won’t make any more changes. But, if past history is any indicator, something will come up that I’ll want to change. When I do, you’ll read about it here. And, as always, if you have any questions or comments, you can contact me through this website.
