This is a copy of an article I originally wrote for L> magazine. It was published in the Sept./Oct. 2015 issue. It’s a great magazine and I highly recommend it if you’re not already a subscriber.
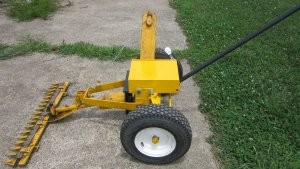
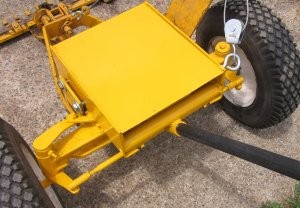
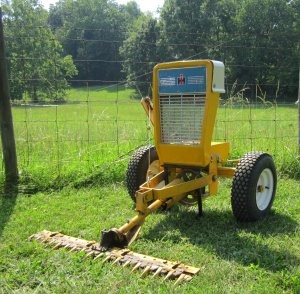
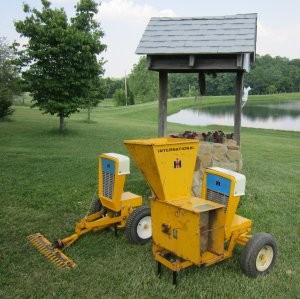
Over many years of collecting Cub Cadets, I have accumulated several attachments. It had gotten to the point where it required a lot of time and expense to just maintain the tractors for these attachments. A few years ago I decided there had to be a better way to load, unload, display, maintain and transport these attachments. I had salvaged several Cub Cadet frames from tractors that were beyond restoration. I cut the front of the frames off about a foot long, added a means of attaching a removable handle to move them around and mounted several of my attachments to these “dollies”.
But after displaying them a couple of times, it became obvious that the casual viewer had no idea what they were. They wondered how they could be used without an engine or “handle bars”. So I decided to add a grill and partial hood to make what I hoped would be a more obvious display. Since the front grills on a Cub Cadet are so heavy, I decided I’d make a lighter, fiberglass grill.
I had some experience working with fiberglass with the Mini 560, Mini H, Mini Cub, and Cadet 95. (The Miscellaneous section of cubcadetman.com contains an article on repairing a Cadet 95 fiberglass body for interested readers.) The process requires that you start with a pattern – a duplicate of the final part. For the Mini tractors I had started by making a wooden pattern, an exact replica of the finished part. For the Cadet 95 I’d used the body of a Cadet 55. The pattern was used to make a mold which was then used to make the final, finished, fiberglass part. Though I’m no expert, through previous knowledge, research and experience, I’ve learned several important points.
- The pattern must contain a “taper” so that the mold can be removed.
- Fiberglass cloth doesn’t unravel as badly if cut on the diagonal.
- A variety of sizes of fiberglass pieces are needed. I used three boxes that contained different size pieces. One box contained pieces in the one to three inch range, one box contained pieces in the four to six inch range, and the third box contained the triangular pieces that result from cutting the cloth on a diagonal.
- Use nitride gloves that are tight fitting; perhaps one size too small.
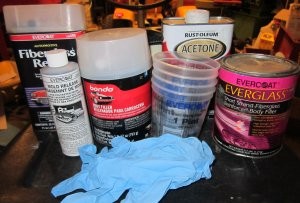
- Purchase a bunch of brushes and measuring cups. You’re going to need them. Acetone can be used to get a couple uses out of the measuring cups and brushes, but that’s about it. If the brushes set for any period of time, they’re no longer useful.
- Use a good mold release product and a wax containing Carnauba.
- A multi-tool with a metal cutting blade works great for trimming fiberglass.
I used a Cub Cadet Model 102 grill housing for my pattern. It had a few rough spots, but it seemed to have the taper that was required to remove the mold. I decided to make the mold in 4 sections that could be bolted together to make the completed mold.
I began the process by painting the grill. I added 1/8” plastic sheet to the back of the housing so when I added fiberglass it wouldn’t wrap around the back and prevent removal of the mold from the pattern. I didn’t want to destroy the integrity of the housing so I used silicone caulk to attach the plastic. I also used the silicone caulk to fill in any undercut sections or sections that would prevent mold removal.
In order to make the mold in 4 sections, I cut cardboard to fit the grill profile and used the cardboard as a pattern to make Plexiglas dividers to use between the mold sections
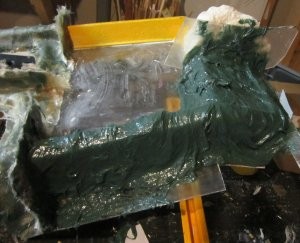
I used home made play dough to hold the Plexiglas sections in place. I started with the upper right section of the grill housing. I waxed the pattern with a wax that contained Carnauba and painted it with a mold release after the wax had dried. Experience had taught me that short strand fiberglass works well for making molds, but it tends to be rather brittle. I was afraid with the complexity around the top section of the grill housing a mold made with short strand fiberglass would tend to break so I used fiberglass cloth.
The fiberglass resin is mixed according to the directions on the can but it’s basically ten drops of hardener for each ounce of resin. Brush resin on a section, lay the fiberglass cloth over the section and use the brush to make sure the cloth fits into all the corners and crevices while adding more resin. Brushing over the cloth doesn’t work well; it’s more a matter of “dabbing” at the cloth to get it into position and soaked with resin. While it’s not recommended, I found that working in a temperature a little below 65 degrees Fahrenheit gave me a lot more time to work with the fiberglass before it “went off”. Also, this is the section that gave me the most problems. Most of the grill I was using had a nice taper that permitted easy removal of the fiberglass sections. But the cut out areas around the light cavity were perpendicular to the surface and rough. I would have saved myself a lot of trouble if I’d just taken the time to smooth and taper this area. I didn’t and it eventually required a lot of hand work on the mold in this section.
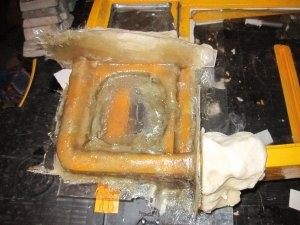
Notice that the material was built up onto the Plexiglas dividers. This provided flat surfaces so that adjacent sections could be bolted together when the mold was complete.
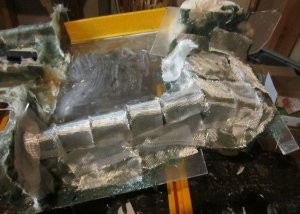
Since the entire bottom section had a nice taper to it, I was able to use the short strand fiberglass. I backed it with fiberglass cloth for added strength.
To mix the short strand fiberglass I just scooped it out with my gloved hand, placed it in a plastic bowl and kneaded it to mix in the hardener. After “smearing” it on the pattern, I covered it with fiberglass cloth. After it “went off” I painted resin over the cloth and added any more cloth where I felt additional strength was needed.
In any areas where some of the fiberglass had seeped under the plastic partition, I used a multi-tool with a metal cutting blade to trim the section to make it flat. I “popped” each section of the mold loose from the pattern after it was finished and replaced it on the pattern before doing an adjacent section. I used my multi-tool with a scraper blade to separate the fiberglass mold from the pattern in any flat sections before I tried to “pop” them apart. A putty knife could be used as well. When all four sections were finished I drilled holes in the connecting sections so I could bolt together a complete mold.
With the four sections bolted together, I waxed the mold and again painted on the mold release. The directions recommend that the mold release be sprayed on, but I’ve found that painting works just as well. When the mold release cures, it provides a thin film over the entire surface that prevents the fiberglass part from bonding to the mold. The short strand fiberglass is heavier than I wanted for my finished grill housing so I used fiberglass cloth and mat to make the part. I found the mat to be much more difficult to work with than the cloth. I only used the mat in flat sections of the mold. Fiber glassing the part is the same process as making the mold. Just paint a section of the mold, place the cloth over it and use the brush to “dab” it into place as more resin is added. I never mixed more than 3 ounces of resin at a time and used acetone to clean the cup and brush between mixings. I applied a layer of cloth, waited for it to cure, applied another layer of cloth, waited for it to cure and then applied fiberglass mat over the flat sections. To apply the mat, I painted a section with resin, placed the mat in position, and did very little “dabbing” before covering it with cloth and more resin. I found that if I messed much with the mat before covering it with cloth, I had a lot of loose strands of fiberglass to deal with. But the thickness of the mat does add a lot of strength to the finished part.
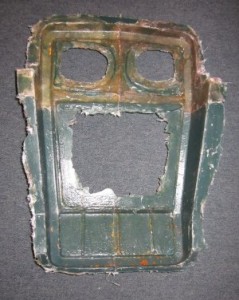
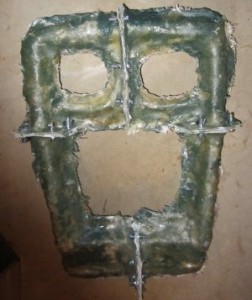
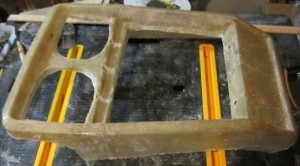
The finished product looked pretty messy while it was still in the mold.
I had left a flat section around the outside of the mold that could be used as a guide for trimming the sides. Again using the multi-tool with a metal blade it was easy to trim the outside edge of the part. The trimmed part looked a lot better. I waited until after the part was removed from the mold to trim the interior sections.
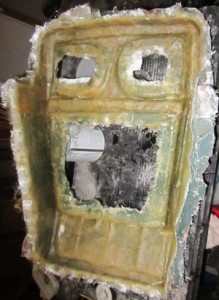
I removed the bolts holding the mold sections together and used a plastic mallet to “persuade” them to separate from the part.
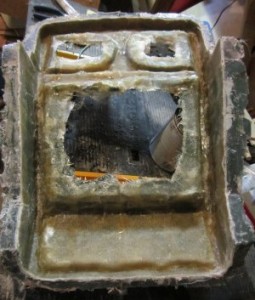
I used the multi-tool to trim the inner sections of the part. I wasn’t too concerned about the top section since the entire section will be covered by the light panel.
There were a few sections of the part that needed a little attention (body putty) but overall I was pleased with the results. As I told a friend, it wasn’t quite as good as I hoped, but was better than I feared it might be. And, it weighed less than four pounds as compared to the 45 pounds for the original grill housing.
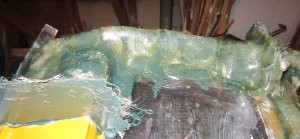
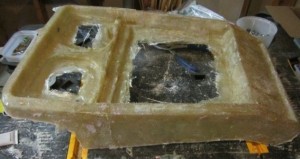
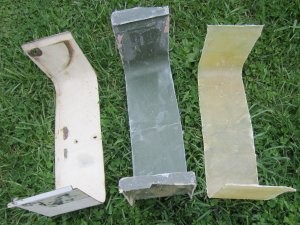
With the grill housing finished, I turned my attention to the hood section. I had a hood that a previous owner had cut several holes in that I cut off a section and used for a pattern. Since the process is the same as for the grill housing, I’ll just show the final results. The picture shows the pattern, mold and finished part.
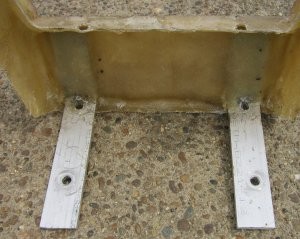
Finally it was just a matter of painting and mounting everything. I bent two 9” long sections of ¼” by 1 ¼” aluminum flat at the correct angle to mount the housing, and used fiber glass to attach them to the back of the fiberglass grill housing.
With a little tweaking, the housing and hood section were ready to paint and mount to the dolly.
If I was starting over, there are three things I’d do differently. First, I would complete the first grill housing before even starting the second one. Because of the cold and rain, I made three housings and hood sections before any painting. When I actually started painting, I found there were sections where I could have used a little more experience and thought.
Secondly, I would have made more “liberal” use of the resin when coating the mold. If a section of fiberglass cloth laid into an area with no resin, I just soaked the back side with resin. In most areas this worked great. But in a few sections the resin didn’t completely cover the underside of the cloth. When I painted the section I could make out the weave of the cloth through the paint. Body putty could be used to cover up these small areas, but then I would loose the rough surface texture like on the original, sand cast grill housing.
The intersection of three internal surfaces made applying the cloth very difficult. The cloth could easily be formed over three intersecting external surfaces, but for internal surfaces, one surface would always “pooch” out as I used the brush to form an adjacent surface. Looking back, I should have worked with two of the surfaces at a time letting the resin cure in between applications.
I didn’t keep close track of prices, but the original mold cost around $100. The majority of that cost was the short strand fiberglass material. After that original cost, each fiberglass grill housing cost less than $25 to produce. In my past, limited fiberglass experience, I’d always worked with smooth, gently curving surfaces. The more complicated surfaces on the grill housing turned out to be a real challenge.
If you have any questions or comments please contact me through this website.
