This is an unedited version of an article I had published in Lawn & Garden Tractor magazine. Their editor “clears up” a lot of what I write, but this should give you a good idea of the article.
The water side of the dam for our lake in front of our house has always been a problem to mow. We tried mowing across the dam with a Cub Cadet but the wheel on the “up hill” side didn’t have enough traction to pull the tractor across. I added dual wheels and weights to a Cub Cadet 102 so that we could mow across the dam on both sides. But on the water side I could only get within a foot or so of the water without getting stuck. So that always involved finishing the job with a weed eater. As we got older we managed to hire some high school boys to do the weed eating for us. But finding someone willing to do that has become more and more difficult.

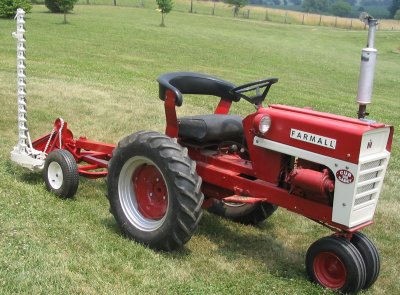
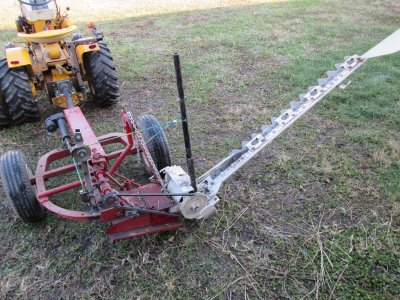
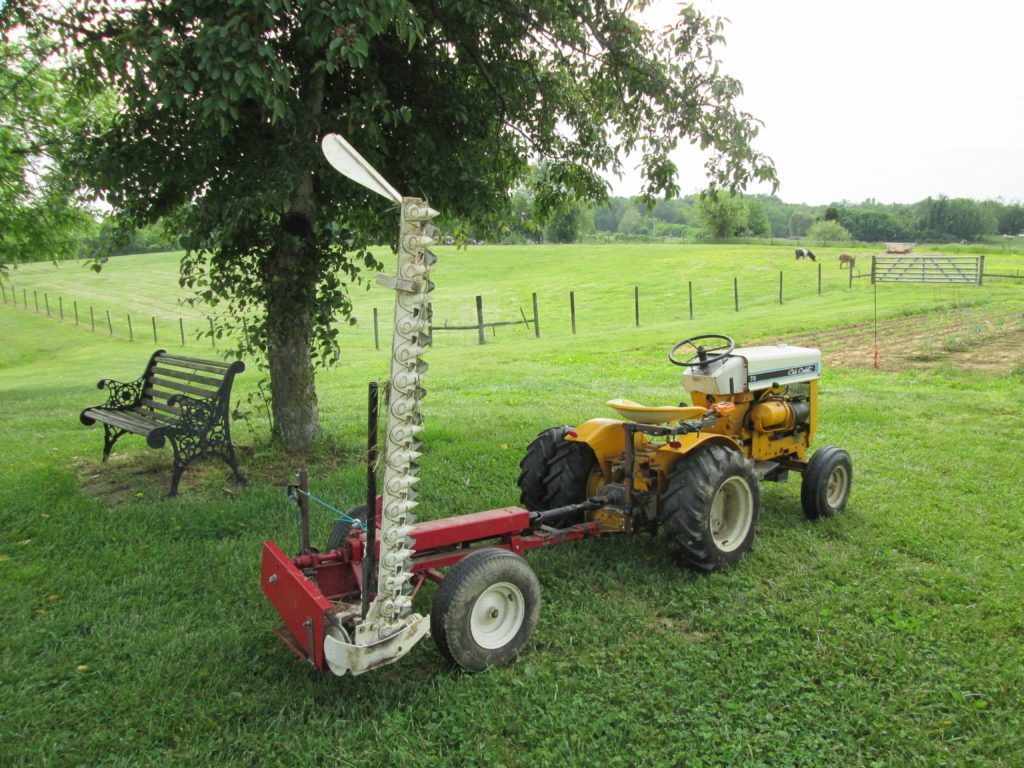
We have a Model 70 Cub Cadet with a Haban Sickle bar mower that I use to mow around all of the lake except the dam. I tried mowing the dam with this mower, but the cutter bar sticking out kept pulling the front end around even with duals. That obviously wasn’t going to work. It made sense that if I could have the mower pull straight back from the center of the tractor it wouldn’t pull the front sideways. A pull type sickle bar mower does that. It has a connection point at the rear hitch to the tractor. The bar pulling on the side of the mower would tend to pull the mower sideways but would still exert a straight pull back on the tractor.
When I first made my Mini 560 I wanted a piece of equipment that would be representative of the age of the tractor. I had a portion of a Haban mower that I used to make a sickle bar mower to pull behind the 560. Since it was just for display I had never made it functional and never worried about proper speed ratios, etc.
I eventually made a 3 point version of the mower for the Mini 560 so I no longer had a use for the pull type mower. I decided that pull type mower would be a good starting point for this project.

This is probably a good place to point out I wasn’t cannibalizing a bunch of Haban mowers for these projects. When I obtained these two mowers, neither had any part of the frame necessary to mount to a tractor. As a matter of fact, the previous owner of the one I used for the 3 point mount had welded some sort of home made frame to it in attempt to use it on the front of a tractor. His idea didn’t work.
If I could use the rear PTO of a Cub Cadet to power the mower, it would be an easy project. While the rear PTO in a Cub Cadet rotates the wrong direction and speed, I decided to try it anyway. I had a Model 73 with a rear PTO that would make a good candidate for this experiment. It only required a few minor modifications from my original pull type mower. I replaced the front section of the PTO shaft with a shaft from a snow blower. Even though the end of the shaft wasn’t splined to fit the Cub Cadet PTO, it was the correct diameter to just slide over the Cub’s PTO shaft. It was a good enough fit to make a preliminary attempt. I added a dual wheel with a 25 lb weight on the left side of the tractor in addition to the 25 lb weight on the left, inside wheel. I never bothered to calculate speed ratios or I would’ve known this attempt was destined to fail.
When I tried this setup it just jammed up with grass. Since the speed of the PTO is dependant upon the speed of the top shaft of the transmission it required a high engine RPM. But that meant a fast ground speed even in first gear. The ground speed was too fast and the mower RPM’s too slow to cut the grass. (Using a creeper gear to slow the ground speed results in a LOT lower RPM of the top shaft in the transmission and an even slower mower cutting speed.) After this failure I actually did some calculations and determined that the top, rear pulley on the mower would have to be something of the order of 3 feet in diameter to get the correct mower RPM. And, even then I’d still have to contend with the fast ground speed and wouldn’t have a live or independent PTO.
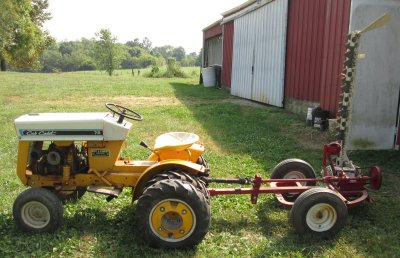
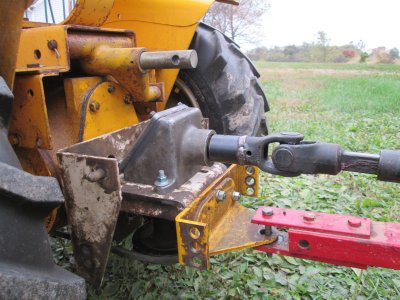
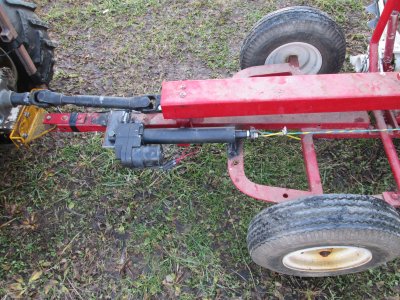
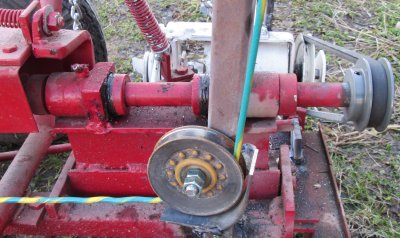
Back to the drawing board!!! I knew some collectors had used the rear gear box from a tiller rotated 90 degrees to the rear to create a rear PTO. This time, with some initial calculations, I determined that would work. I had an extra mount and gear box to use. On the Model 123 I use for tilling I had used a jack shaft under the tractor to permit using two shorter (read that as cheaper) belts than the one long one ordinarily required.. I tried using this jack shaft on my Model 73, but going from a hydrostatic drive to a gear drive just required too many modifications of the mounting. I decided to start from scratch and ordered two ¾” pillow block bearings and a 3” diameter double pulley. With a little work and a lot of measurements, I had a jack shaft that would work on the Model 73.


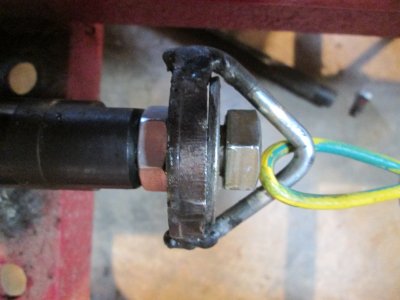
The bore of the front of the snow blower PTO shaft I used on the mower was too large for the Cub Cadet gearbox. So I used a ¾” sleeve I had and welded it to my snow blower PTO shaft.
My calculations also showed that with the new setup I needed a much smaller pulley on the rear of the main drive line than I had been using on the mower when I used it only for display.

With the changes, I was ready for another trial. This time I was much more successful. But, about a third of the way across the dam, I lost my courage. I had tried driving the tractor across the dam with nothing attached. That worked fine. But pulling the mower made the front of the tractor tend to slide down the hill. I raised the cutter bar and pulled out. I was getting closer.
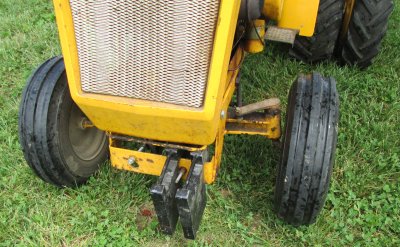
I switched the front tires on the 73 with some tri ribs I had on a Model 71 that I mowed with. Another attempt. While the tri ribs worked for the front end, there was enough drag from the mower that the “up hill” rear wheel started spinning after going about another 20 feet. And, if you’re on the side of a hill and your tires spin, the tractor tends to work it’s way down the hill – towards the water. Again, I got off the tractor, raised the cutter bar and pulled out. I needed to be able to remotely lift the bar to limit the drag from the cutter bar.
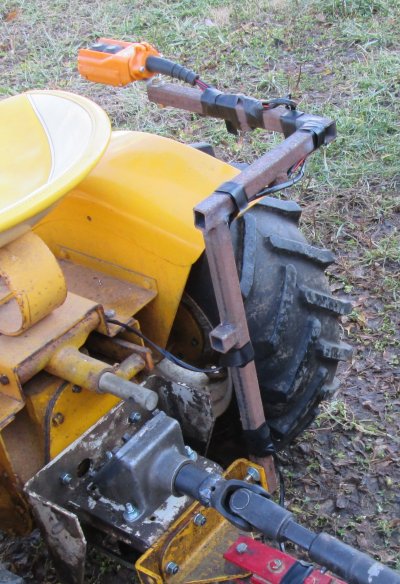
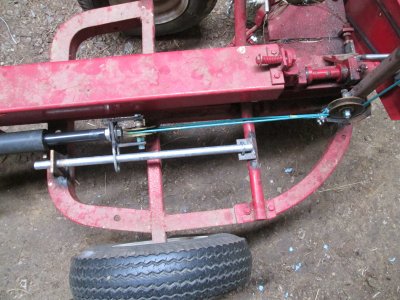
A few years ago a good friend had convinced me to purchase a linear actuator at a flea market. It was cheap and had a 10” stroke with a 1500 lb lift capacity. I decided that would be much easier to use than trying to figure out a hydraulic setup. I considered several options but finally decided that mounting the actuator along side the mower tongue and using cable to lift the cutter bar would make the easiest and most versatile setup.
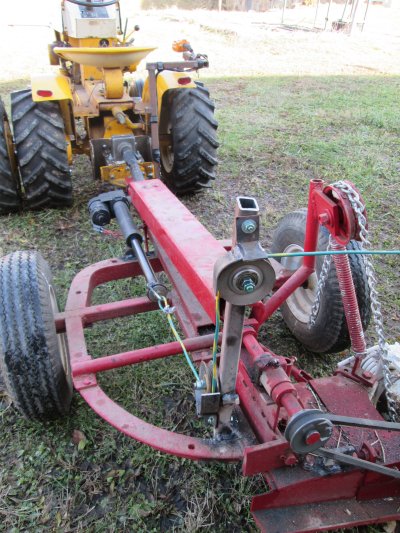
I had to make brackets that wrapped part way around the pulleys to make sure the cable wouldn’t slip off if the cable became too slack.
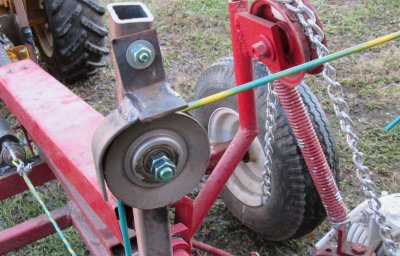
Although the actuator is supposed to have a built in clutch, I added one of my own making to prevent it from twisting the cable.
I mounted the control switch directly to the tractor so that it would always be in the same position no matter the location of the mower.
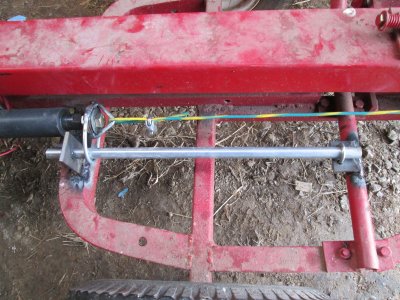
When I tried just raising and lower the sickle bar, I found that my rudimentary slip clutch was only partially effective. While raising the bar there was enough friction that it would sometimes twist the cable. The cable would always unwind as the bar was lowered but this couldn’t be good for the cable. I found it didn’t take much to prevent this winding so I added a simple, parallel bar that I could use to prevent the rotation.
I added an additional 25 lb wheel weight to the outside, dual wheel as well as two 25 lb weights to the front end and I was ready to try again.
Unfortunately time had run out on me and it was now winter weather. The next attempt had to wait until Spring.
In the Spring it finally stopped raining and dried up enough that I could try everything out. IT WORKED!! I managed to mow all the way across the dam with little problem. There were still a couple “tweaks” I wanted to make but I was pleased with the progress.
My lift didn’t raise as fast as I needed. I almost had to stop and wait for even a small adjustment. I attached a pulley to the ram on the lift and looped the cable back to double my lift speed.

One of the other tweaks was to add a one inch bigger pulley at the end of the PTO line to give me a little more knife speed. The knife speed was fast enough at wide open throttle, but these mowers don’t pull that hard so I really didn’t need to run wide open. And, with the slightly larger pulley I always have room for a little extra speed if I get in tall or tough grass.
The other tweak was to add a caution light for mowing along our roadside.
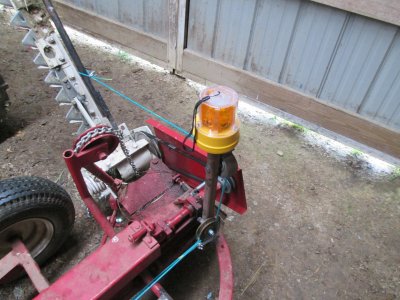
It doesn’t hurt to take a little extra precaution when working along a roadway. It can be a little scary when cars zip by while you’re concentrating on where you’re mowing and they don’t seem to notice you.
And, that’s it. I’m well pleased with the results. I’ve used the mower several times and it sure beats weed eating. It needs a little painting, but that will have to wait until I don’t need it for a while.

As always, if you have any questions or comments, you can contact me through this website.
